Troubleshooting AeroPress Grit: Eliminate Sediment for a Perfectly Clean Cup
Troubleshooting AeroPress Grit: Why Your Perfection has a Gritty Secret
The AeroPress is famous for producing clean, full-bodied coffee with fantastic consistency. Its rapid brewing time and unique immersion method have made it a coffee aficionado’s dream and traveler’s friend. But all-too-familiar irritation can become a problem, ruining an otherwise perfect cup: dreaded grit or sediment at the bottom.
If you’ve been left with a gritty grind, don’t despair. As a brewer who’s gazed deeply at the craft of coffee brewing, I can assure you that this issue is very solvable. Having knowledge of its causes and making a few simple adjustments will get your AeroPress back to its renown for sparkling cleanliness.
The Promise of AeroPress: A Clean Cup, Usually
The AeroPress itself, and particularly its paper-filter (or metal-filter with superfine mesh) construction, is built with the goal of producing an incredibly clean cup, one that is largely free of the sludge and fines prevalent with French press brewing. If grit does appear, it’s a signal that something in your process can benefit from an adjustment.
The grit that you observe is literally super-fine coffee particles – “fines” – that somehow escaped your filter during brewing or pressing.
Finding the Source: Root Causes of AeroPress Grit
Addressing the grit starts with understanding where these elusive fines are coming from. These are the most common offenders.
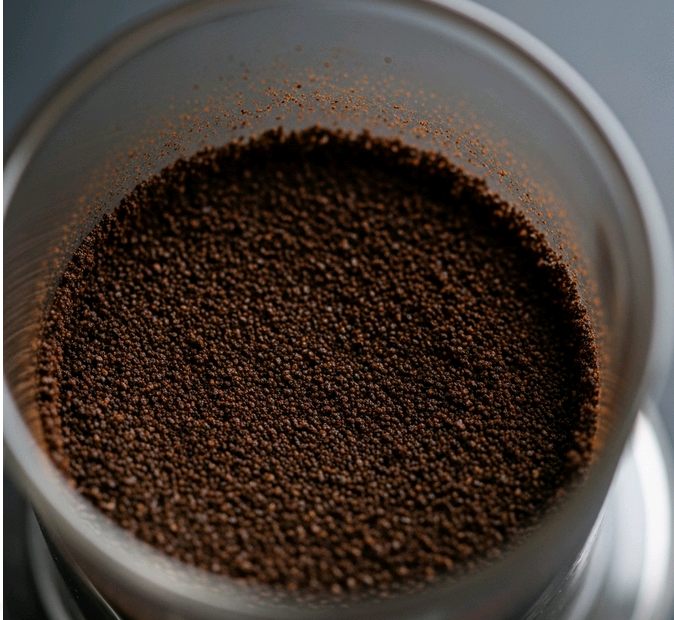
- Grind Size Too Fine: This is, by far, the primary cause for grit. Though AeroPress is forgiving of grind size, too fine (finer than table salt, approaching espresso or Turkish coffee fineness) will produce too many fines that even the paper filter cannot keep up with. These are extremely fine particles that can pass through the pores of the filter.
- Unreliable Grind Quality: Unless your average grind size is correct, a poor-quality grinder (particularly blade grinders) will make a very uneven grind, at the same time producing a large percentage of “boulders” (large pieces) and “fines” (dust-like particles). It is these fines that find their way into your cup.
- Faulty or Damaged Filters: A slight tear, a fold, or simply not seating the filter correctly into the cap can create an infinitesimal gap. A millimeter gap will allow fines to pass.
- Excessive Force When Pressing: Too firm or too rapid a press on the plunger may build enough pressure to force fine particles through the filter. Steady, slow press is necessary.
- Filter Quality (Unusual): While abnormal, a run of paper filters might be slightly off in quality, with larger than average pores, so more fines are passed.
- “Bypassing” the Filter: Sometimes fines can adhere to the chamber side or plunger seal and travel through the filter during the press.
The Solutions: Grit-Free AeroPress Perfection
Now that we’ve found the potential problems, this is how to implement the solutions and get back your perfectly clean cup:
- Dial in Your Grind Size
- The Golden Rule: This is your number one and best adjustment. Target a grind size that’s similar to fine table salt or a little finer. It must feel gritty, not powdery, in your fingers.
- Gradually Adjust: If you’re noticing grit, try making your grind slightly coarser. Test and adjust until the grit disappears with you still being able to achieve your preferred extraction.
- Invest in a Good Grinder: If you’re settling for a blade grinder, splurge on a burr grinder (hand or electric). Burr grinders provide an exceptionally more even particle size, reducing by leaps and bounds the amount of pesky fines. This benefits overall coffee quality greatly, not just grit prevention.
- Inspect and Seat Your Filter Properly
- Inspect for Damage: Before brewing, just give your paper filter a quick glance for tears, folds, or flaws. Dispose of the damaged ones.
- Correct Seating: Position the paper filter completely flat and centered inside the filter cap before twisting it onto the brewing chamber. A moistened finger might stick to it.
- Employ Two Filters: As a last resort and if you must have complete cleanliness, you may use two paper filters. This will slow your press very slightly but slash fines drastically.
- Master Your Pressing Technique:
- Slow and Steady Wins the Race: Press the plunger gradually and evenly, with gentle, sustained pressure. Don’t force it or plunge rapidly. A 20-30 second press is often just right.
- Stop. Prior to the Hiss: The majority of AeroPress aficionados recommend stopping the press right where you hear the hiss of air, to the point where you don’t press any further. This is a small amount of coffee and the residual. fines that are left in the chamber and prevent them from getting flushed. into your cup.
- Cleanliness is Key
- Rinse Comprehensively: Rinse all AeroPress parts after every use. Coffee oils and desiccated sediment can at times become stuck, and may then be dislodged into your subsequent brew.
- Inspect the Plunger Seal: Make sure your rubber plunger seal is clean and debris-free that could obstruct an efficient seal.
- Experimentation of Brewing Methods (Inverted vs. Stock):
- Some individuals find that the inverted method (brewing with the AeroPress held upside down in the first place and then turning to press) occasionally is less likely to leak fines accidentally before pressing, since gravity is not pulling liquid through the filter prematurely. However, both methods can produce clean coffee if executed correctly.
Conclusion: Clarity in Your Cup, Every Time
Glad at the bottom of your AeroPress coffee is not evidence of a broken brewer; it’s generally evidence that a small adjustment in your equipment or technique is all you need. With a keen eye towards consistent, appropriate grind size, a perfect filter, and a smooth pressing motion mastered, you won’t have difficulty achieving the clear, sediment-free cup the AeroPress is famous for. Enjoy the merits of smooth!
FAQs
Why is my AeroPress plunger sticky?
Your AeroPress plunger might feel sticky because the rubber seal needs a little lubrication—just a drop of water or some coffee oil can do the trick! It could also be due to dried coffee residue or oils on the rubber gasket or inside the main chamber. A good cleaning and rinse usually fix the issue.
What should AeroPress grind look like?
For the AeroPress, you want a grind that’s fine to medium-fine, similar to table salt. It should feel gritty, not powdery, when you rub it between your fingers. Consistency is crucial, so steer clear of grinders that leave behind a lot of fine particles or large chunks.
Why is AeroPress so hard to push down?
If you’re struggling to push down your AeroPress, it’s often because the grind is too fine, you’ve used too many coffee grounds for the amount of water, or you’re plunging too quickly. All of these factors can create too much resistance in the brew chamber.
What grind is too fine for AeroPress?
A grind that’s finer than espresso, resembling a powder or flour, is too fine for the AeroPress. This kind of grind can severely limit water flow, making it really tough to press down and can lead to over-extraction and bitterness.
Should I wet my AeroPress filter?
Absolutely! It’s a good idea to rinse your AeroPress paper filter before brewing. This helps eliminate any papery taste that might seep into your coffee and ensures the filter is properly seated for a solid seal.
Why is my plunger not sticking?
If your AeroPress plunger isn’t sealing well, it’s often because of coffee grounds or oils on the rim of the chamber or the rubber seal of the plunger. The rubber seal itself might also be dry, or if it’s quite old, it could be worn out and need replacing.
How long should AeroPress steep?
AeroPress steeping times are quite flexible, ranging from 30 seconds to about 2 minutes. The perfect time really depends on your grind size, water temperature, and how strong you want your coffee. Shorter steep times usually result in a brighter cup, while longer ones can bring out deeper flavors.
Is AeroPress better than Pour-Over?
Neither is universally “better”; they offer different experiences! AeroPress is praised for its speed, full-bodied immersion brew, consistency, and easy cleanup. Pour-Over often excels at highlighting delicate flavors and achieving a clean, nuanced cup with more clarity. It truly comes down to your personal taste preference and brewing priorities.
How to get more clarity from AeroPress?
To achieve more clarity and reduce sediment from your AeroPress, try using a slightly coarser grind, pre-wet your paper filter thoroughly, and use gentle, slow, and even pressure when plunging. Some users also find that stopping the press just before the “hiss” helps to leave any remaining fines behind.